QoS Misc. 1 Q/A

How to block cisco.com/go/support using QoS matching DNS name, while allowing the web access to the host like cisco.com:


How to read the output of CoS-DSCP map

d1 is digit-one of the dscp, d2 is digit-two of the dscp. The intersection of the two digits gives the cos value for that particular dscp value.
e.g. for dscp 46, we can see the cos value is 05, while dscp 48 has cos 06 and dscp 64 is not shown as it is invalid.
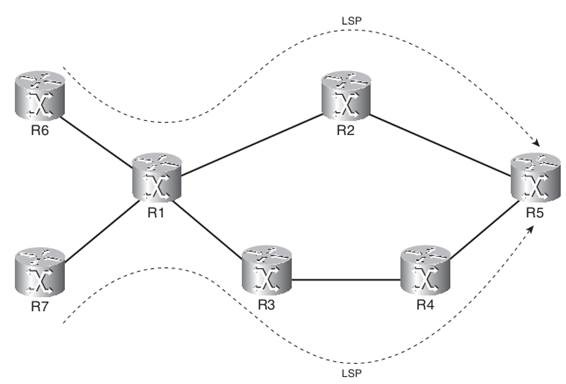

Priority Queuing

Q: When I set priority-list 1 queue-limit 5 45 66 80 (I am setting the priority queue to 5 packets) I would think I would want this to be my highest #. In short I don’t think I understand this concept. If I set the priority queue to 80, then my priority traffic could accept 80 packets before it moves to the next queue. I would think this would be a good thing. I am sure I am not seeing this the right way.  Can somebody explain please?

A: The queue-limit is simply how many packets each queue will hold. That is, the size of the queue.
With priority queuing, the scheduler will always try to empty the higher queues first before moving to the next-highest.
Ex. empty the high queue first, then medium queue, then normal queue and then finally low queue.
That’s why texts often mention the possibility of queue starvation.
When you have congestion on the interface, (which is the only situation you would engage the software queues) you would want your high priority traffic sent first.
You can set the limit (size) to whatever you want, but if you classify your traffic incorrectly, or rather too “loose”, putting too much into the high priority queue, you would end up servicing this queue all the time.
Tail drop should occur when you can’t “buffer” any more data, yes.
PQ is a double edged sword in my opinion.

Share this!

Switching Misc. 1

To authenticate 802.1x clients:
SW1(config)# dot1x system-auth-control
SW1(config)# aaa new-model
SW1(config)# aaa authentication dot1x default group radius
SW1(config)# radius-server host 150.100.220.100 key ipexpert
  • When a PC doesn’t support EAP, it can be placed in a guest-vlan:
    dot1x guest-vlan 200
  • When the authentication is failed:
    dot1x auth-fail vlan 100

Port-security table won’t survive a reload unless using “sticky” parameter.


switchport protected: The ports cannot communicate even with other ports in the same VLAN


Assign a static switching table entry
SW1(config)# mac-address-table {dynamic | static | secure} mac-addr {vlan vlan-id} {interface int1 [int2 … int15] [protocol {ip | ipx | assigned}]

If the destination port is a trunk, you must also specify the destination VLAN number vlan-id.

Set the switching table aging time:
SW1(config)# mac-address-table aging-time seconds [vlan vlan-id]

For VLAN number vlan-id (2 to 1001), entries are aged out of the switching table after seconds (0, 10 to 1,000,000 seconds; default 300 seconds). A value of 0 disables the aging process. The VLAN number is optional. If not specified, the aging time is modified for all VLANs.

Optimize the port as a connection to a single host
SW1(config-if)# switchport host

Several options are set for the port: STP PortFast is enabled, trunk mode is disabledEtherChannel is disabled, and no dot1q trunking is allowed.

Share this!

BGP Routing using Policy Controls

  • Service Provider should filter some IP prefixes in incoming updates, such as RFC1918. Because a customer should only advertise its global networks to the Service Provider.
  • Multihomed Customers should avoid becoming a Transit-AS. As by default in most of the cases the tie breaker for BGP is the Shortest AS-Path, so the providers connected to the to customer will use the customer link as a Transit-AS to reach each other.
  • Service Providers should filter Private addresses in incoming updates of Customers.
  • In a scenario where a customer has two border routers without IBGP, and IGP inside the AS, there will be no loops, but if running IBGP between the border routers, special care should be taken or a direct link between the two border routers is required.
  • Policy Routing only affects the Next-Hop. The destination is unchanged!
  • Policy Routing is CPU intensive, because it is based on the source unlike Dynamic and static routing. So, when routing based on the destination there is no need of Policy Routing.
  • Customers can only affect their outgoing traffic, and can’t directly affect incoming traffic.
    (config)# ip as-path access-list# [permit/deny] regexp
    (config-router)# neighborip-address filter-list as-path-filter# [in/out]

Continue reading “BGP Routing using Policy Controls”

Share this!

MPLS Fundamentals: 6 – MPLS TE

The role of TE is to get the traffic from edge to edge in the network in the most optimal way.

  • MPLS TE takes into account the configured (static) bandwidth of links.
  • MPLS TE takes link attributes into account (for instance, delay, jitter).
  • MPLS TE adapts automatically to changing bandwidth and link attributes.

MPLS TE allows for a TE scheme where the head end router of a label switched path (LSP) can calculate the most efficient route  through the network toward the tail end router of the LSP. The head end router can do that if it has the topology of the network.  Furthermore, the head end router needs to know the remaining bandwidth on all the links of the network. Finally, you need to  enable MPLS on the routers so that you can establish LSPs end to end. The fact that label switching is used and not IP forwarding  allows for source-based routing instead of IP destination-based routing. That is because MPLS does forwarding in the data plane by  matching an incoming label in the label forwarding information base (LFIB) and swapping it with an outgoing label.

Therefore, it is the head end label switching router (LSR) of the LSP that can determine the routing of the labeled packet, after all  LSRs agree which labels to use for which LSP.

Share this!

MPLS Fundamentals: 3 – LDP

Basic MPLS LDP Configuration

224.0.0.2 group IP multicast address. The UDP port used for LDP is 646.

LDP Discovery

show mpls ldp discovery detail
show mpls interfaces

LDP discovery timers manipulation

mpls ldp discovery {hello {holdtime | interval } seconds

The default value for holdtime is 15 seconds for link Hello messages, and the default value for interval is 5 seconds.
If the two LDP peers have different LDP Hold times configured, the smaller of the two values is used as the Hold time for that LDP discovery source.

Cisco IOS might overwrite the configured LDP Hello interval. It will choose a smaller LDP Hello interval than configured so that it can send at least three LDP Hellos before the Hold time expires. (At least nine Hellos are sent in the case of a targeted LDP session)

Continue reading “MPLS Fundamentals: 3 – LDP”

Share this!